As 2014 comes to a close it’s time to slow down, reflect, and take inventory. Over the past 11.5 months I’ve added some new tools and resources to my design process and I’d like to share a few of them with you. If you’re interested in how Newfangled’s total design process has evolved over the last year, check out this post.
The following list is in no particular order of preference and it’s certainly not exhaustive. Feel free to offer your opinion regarding my choices or make your own recommendation in the comments below.
Fontface Ninja
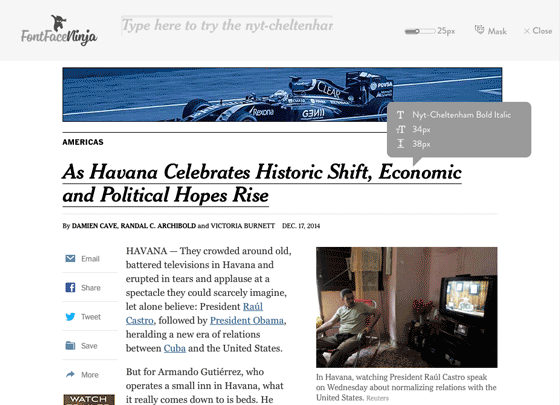
I’ve used the WhatFont browser plug-in for several years now and it does a great job of identifying font specs from a website but Fontface Ninja has a few extra features that make it a worthwhile addition to your browser bar (especially since it’s free).
Like WhatFont, Ninja can identify a font’s face, size, and line height, but the plug-in also activates a test bar above the top of the website when you click on a sample of text. This test bar allows you to type some sample text using the font at a range of sizes. In some instances, you can even download the font to try it out in Photoshop. Ninja assumes you’ll use the downloaded font for trial use only, so be honest. Ninja also provides a masking feature which removes all of the design elements from a webpage except for the editable text. It’s a great way to survey just the fonts on a page.
Awesome Screenshot
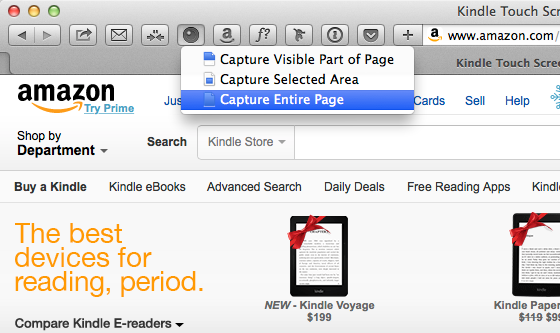
The best feature about Awesome Screenshot is its ability to capture an entire webpage (no matter how long) in a single screenshot. I’ve found it very handy for cataloging old websites and taking screen grabs for blog posts. The only drawback I’ve noticed is that if a webpage contains fixed position elements (like a sticky main navigation), the app will repeat that element in intervals across your screenshot. I’m hoping the makers of this app can find a remedy in a future release. Awesome Screenshot also has tools for annotating your screenshot before saving it as a PNG file.
Page Layers
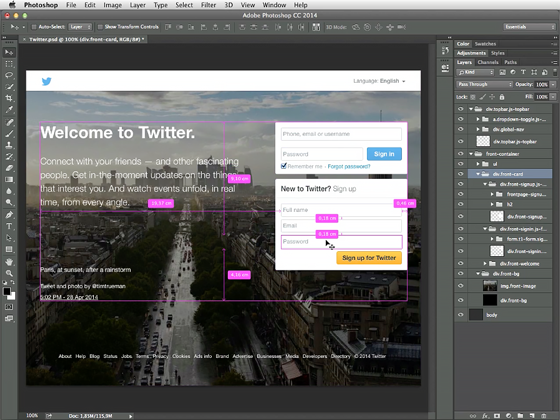
Page Layers is a screenshot app that converts web pages into layered Photoshop files. This is very handy if you’re upgrading an existing site and need to work with just a few elements. The app also labels each page element according to the site’s structure, which is a great way to learn how websites are put together. At $34.99 it’s a bit pricier than most apps, but well worth the cost.
Little Ipsum
There are dozens of lorem ipsum generators out there and I hesitate to recommend any of them because I try to use real copy in all my layouts. Placing client-supplied copy into a layout vs. dummy copy gives me (and my client) a more realistic view of the page and reveals any content issues regarding spacing, focus, or information hierarchy.
But there are times when I need to experiment with a block of dummy copy for testing out font specs. Little Ipsum sits in my menu bar and allows me to quickly select a single word or up to four paragraphs, which it automatically copies to my clipboard. Easy peasy (and free).

Photoshop Extensions
Photoshop has been the go-to app for web design for almost 20 years and Adobe is always making improvements to its functionality. The most recent version of Photoshop (Creative Cloud 2014) has some nice features for aiding in web layout, such as contextual guides and measurements that can be temporarily activated by holding down the command key and moving your cursor over a page element. But the best way to add functionality to Photoshop is through third party extensions. Here are a few of my favorites.
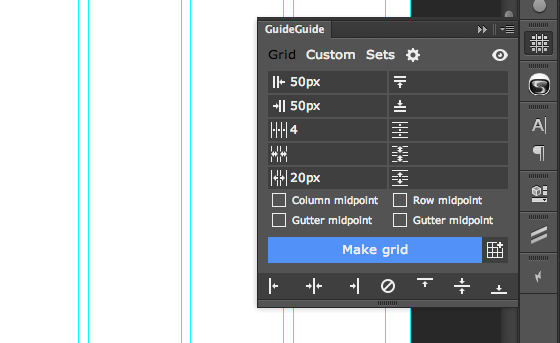
GuideGuide
As the name suggests, GuideGuide creates guides within your Photoshop document, either based on the canvas size or within a given selection. You can set several parameters, including number of columns and gutters, as well as setting edges and midpoints. The extension also accepts grid notation commands for creating your own custom grids. The only thing that would improve GuideGuide would be labels for the different selector icons, some of which are difficult to tell apart.
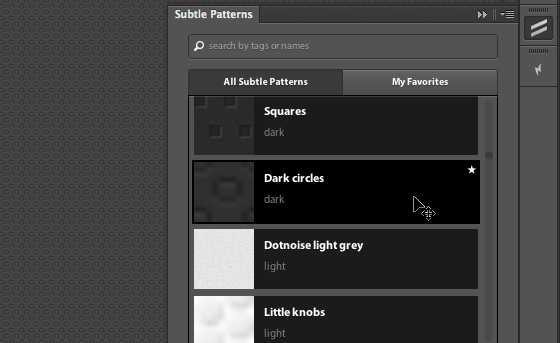
Subtle Patterns
I’ve been using Atle Mo’s Subtle Patterns for a while, but now I can access his entire library from a handy menu which allows me to search by title or tag and even create a favorites list for quicker access. These patterns are truly subtle and beautiful and are easy to apply. Simply create a new Photoshop layer and double-click your selection from the pattern menu.
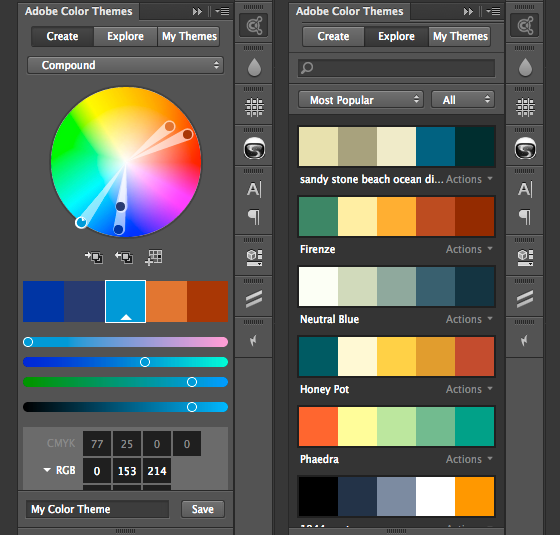
Adobe Color Themes (formerly Kuler)
This native Photoshop extension contains a massive community-built color palette library as well as a powerful custom palette builder. To create a new palette you select a base color, determined by using one of the five color spaces or importing it from your Photoshop swatches palette, and let Color Themes build a five-swatch palette based on one of these color wheel formulas: analogous, monochromatic, triad, complementary, compound, or shades. You can also select “custom” and move the swatch loupes around the color wheel to find the best combination.
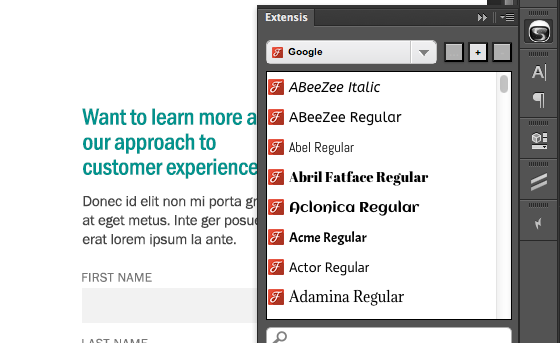
Extensis Font Menu
Web fonts have made creating beautiful typography on the web a reality but sourcing web fonts and wrangling them into Photoshop has been a bit of a challenge. Previously, I had to purchase the desktop version of each web font I planned to use, install it in my font manager, and activate it for Photoshop use.
The Extensis font menu allows you to self-host desktop versions of Google and Typekit fonts from within Photoshop. This single access point is much more convenient than having to download and install each desktop font individually.
Unlike the other extensions I’ve reviewed, Extensis Font Menu is not a stand-alone extension but only available by purchasing the font management software Suitcase Fusion 6, (Extensis offers a 30-day free trial). Also, to bring Typekit fonts into Photoshop you’ll need a Typekit subscription.