
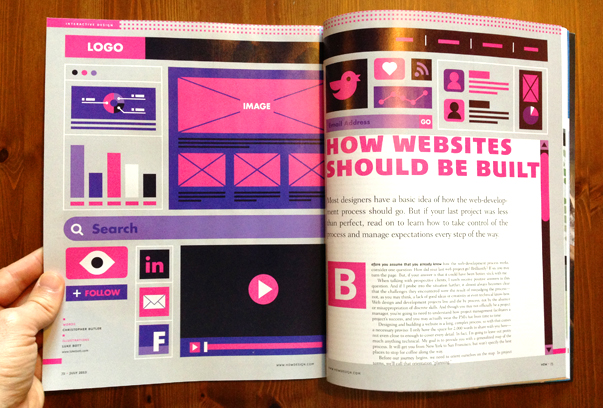
The interactive feature in the July, 2013 issue of HOW Magazine is an article I wrote about the web development process. It’s called How Websites Should Be Built… Also, cool illustrations and charts by Luke Bott.

Before you assume that you already know how the web-development process works, consider one question: How did your last project go? Brilliantly? If so, you may turn the page. But if your answer is that it could have been better, stick with me.
When talking with prospective clients, I rarely receive positive answers to this question. And if I probe into the situation further, it almost always becomes clear that the challenges they encountered were the result of misjudging the process — not, as you may think, a lack of good ideas or creativity or even technical know-how. Web design and development projects live and die by process, not by the absence or misappropriation of discrete skills. And though you may not officially be a project manager, you’re going to need to understand how project management facilitates a project’s success, and you may actually wear the PM’s hat from time to time.
Designing and building a website is a long, complex process, so with that comes a necessary proviso: I only have the space for 2,000 words to share with you here — not even close to enough to cover every detail. In fact, I’m going to leave out pretty much anything technical. My goal is to provide you with a generalized map of the process. It will get you from New York to San Francisco, but won’t specify the best places to stop for coffee along the way.
Before our journey begins, we need to orient ourselves on the map. In project terms, we’ll call that orientation “planning.”
Planning
Planning doesn’t have to be any more complicated than gathering as a team to work out what will be done, who will do it, when it will get done, and what it will cost. You find a nice, round table near a whiteboard and hash it out. Who doesn’t love a nice whiteboard?
By hash, I mean the following: Begin with the business objectives. Allow the group members to strategize how to meet these objectives using their collective expertise. Identify the audience and develop a content strategy that suits them. Sketch out a data flow that properly locates the website you’re planning within the larger marketing ecosystem consisting of its content management system (CMS), a customer relationship management tool (CRM), and a marketing automation suite. Remember, a website doesn’t just display information; it gathers it, too. Then, get everyone’s opinion on how long they’ll need to do this work and how much it will cost. Write all of this down. It’s your plan now.
What’s more important than how planning happens is that it happens at all. (It’s not a project if step one is making something; that’s like diving head-first into a concrete kiddie pool.) The more complex the project, the more involved planning will need to be. So, extra points if you account for planning in your project budget because, yes, talking about work is work.
Prototyping
We begin our work with another form of planning, one that allows for much more detail than a roundtable discussion or even a really big whiteboard.
A prototype distinguishes itself from a paper wireframe by being interactive (clickable!) and describing the information architecture of a website as well as its functionality and aspects of its user experience — aspects, because prototyping ignores how things look as much as possible. A prototype’s main job is to bridge the gap between printed site maps, lists of technical requirements, and the final website by serving as a form of documentation concerned with informational hierarchy and functionality, not aesthetics. Since it’s going to be handed off to designers and developers, it’s better if it’s ugly and clear than pretty and confusing.
The order in which you actually build a prototype may be, in some places, somewhat counterintuitive, but sequence is important to ensuring that big decisions provide a stable foundation for smaller ones.
Typically, I break the prototyping process into six stage:
- Resolve the general information architecture of the website, and determine what pages it will contain and how the pages will be organized.
- Specify the structure and informational content of business-critical pages, like product or service landing pages.
- Specify the structure and informational content for content marketing pages like articles and blogs, and determine the calls to action that correspond to each.
- Pause to consider the metadata each type of content will contain because that will become the backbone of search and filtration tools.
- Resolve the contents and structure of the homepage
- Account for third-party integrations, such as with CRMs or inventory databases.
In general, if you expect the website to contain it, then it needs to be in the prototype.
Visual Design
I realize that even using the name “visual design” may alienate some readers. Yes, this entire process is imbued with design, so drawing a distinction between “design” and “visual design” runs the risk of reducing this phrase to a level of importance analogous to, say, painting the walls of a new house. But drawing the distinction is a necessary evil in this process so that the proper focus can be put on particular aspects of design at the right times. In prototyping, the focus should be on information architecture, while in this stage, the focus should be on how the look and feel apply to that architecture.
The visual design process begins with the creation of mood boards, which are actually another form of prototyping. A mood board focuses in on the visual elements that make up the look and feel of a website — imagery, colors, typography, etc. — and explores how they work together independent of specific page layouts. The closer they are to collage, the more effectively they focus everyone’s thinking on how a website’s aesthetics support the brand.
Once the prototype and mood boards are resolved, the visual design process proceeds as a fairly straightforward application of the look and feel to page structures. Since the elements of style have already been chosen, this is much more busy work than creative process. But the result will be what everyone expects of “design”: layouts that look like what the user will see.
Production
A lot happens here. Like, for real. Code and stuff. But I’ll keep it pretty brief. Production is the implementation of what you’ve designed in your prototype and finalized in your composition files — the blueprints for what your developer will build.
Depending upon the makeup of your team, this could be an iterative experience, where there’s flexibility between what has already been decided and what is implemented. Or, it could be more rigid, where implementation is limited to only what has already been approved, and all else is a change order. Those dynamics are up to you — both have their pros and cons — but they’re typically the result of circumstance, not preference.
Generally, though, you can expect production to be a bit quieter than previous phases, which makes it a good time to check in on third-party integrations while your developer is busy. In fact, if your site will be integrated with a CRM or marketing automation suite, you’ll need to have already set up those accounts and configured campaign logic before the code that enables the website to talk to these tools can be written.
Feedback
Once production has reached a “pencils down” moment, what has been built can be tested. You can call this quality assurance (QA) or the “tweaks phase,” but I favor “feedback.” This is when people start using what you’ve made or, in other words, when you start finding out if what you’ve made actually works.
So be warned: This feedback phase is a long stretch of time where you’ll feel like you’re repeatedly failing because, no matter how good the plan, no matter how beautiful the design, no matter how excellent the code, there will always be things that need to change once you’ve finished. And even after you change them, they’ll probably need to change again. There are simply no perfect launches. When what you’ve designed is used, better ways of doing things that you’ve already spent time and money doing differently will be revealed. It’s OK; that’s exactly what feedback is for. That’s the why of feedback. How it’s gathered is much more straightforward.
I’d recommend a preliminary round of quality assurance and testing before you reveal anything to a client. A solid plan should cover general functionality that would be relevant to any site (e.g., “Do the submit buttons work?”), as well as an emphasis on the functionality and logic unique to the particular site you’ve designed. In addition to all of that, you’ll need to take time to conduct comprehensive contextual testing, which means looking at every page and using every tool in every browser and every device you consider relevant. That’s typically a much larger set of variables than you want it to be, by the way. This is all internal feedback, of course. Be prepared to do it all over again once your client gets their first look.
I put an emphasis on describing how the feedback stage feels for a reason. What feedback does is pretty clear. But we’re rarely well-prepared for how it feels to receive feedback, and how we respond to it will determine whether a project is a success or a long, drawn-out nightmare. When feedback starts pouring in, we can quickly run out of steam. It’s when designers lose hope. It’s when developers lose patience. It’s when clients feel disappointed or mislead.
But feedback can also be thrilling because when we expect setbacks in advance, we’re better able to appreciate the few steps forward we’ve taken. It’s a matter of perspective. I’ve heard it said that “expectation is disappointment waiting to happen.” There’s certainly wisdom there, however pessimistic it may sound. But if one expects a bump in the road, the jostling is far less unpleasant.
Launch
Launching a website, or “going live,” is a punctuation on all of your efforts so far. It typically takes just a couple of hours of coordination and technical maneuvering, after which comes another round of testing just to be sure that going from a staging environment to a live one didn’t break anything.
After that? Beers! Or whatever form of celebration you see fit. Cake is also nice. But be sure to enjoy that cake, because going live is really just a momentary pause in between bouts of working. For any website, going live is really just the beginning. Once the public starts using what you’ve designed, everything changes — and quickly!
Related Posts
-

This webinar will explain what user personas are and how to use them to build…
-
The interactive feature in the July, 2013 issue of HOW Magazine is an article I…
-
Our journey from consultants to implementors and back to consultants again. Newfangled is a very…