Last month, I outlined some general principals for styling your website content and emphasized that how your content looks on the page is as important as the written words. This month, I’ll suggest some ways to incorporate quality imagery into your content that will enhance its impact.
Begin With the Source
For some, the biggest challenge of working with visual content is selecting the right kind of imagery. Being able to distinguish between a good stock image and a clichéd or poor quality stock image is a good first step (I covered this in my previous post), but knowing what kind of image to use for your newsletter or blog post is important, too.
Photos
One of the problems with stock imagery is that it’s a generic solution to a specific problem. Most people can spot the difference between a stock business executive and a real one, and who wants to be thought of as generic? So it’s worth the time and expense to have a professional photographer spend a half-day at your organization to help you build a portfolio of quality photos. Can’t afford a professional photographer? Somewhere among your business colleagues, friends or family is an amateur photographer who would love the opportunity to increase their experience (and happily accept an Olive Garden gift certificate for two as compensation).
 If it’s just you and your smart phone, there’s still plenty of opportunity to produce a good photo that can be used either straight from the camera or, with a little post-production work, become something truly unique. I’ve listed a couple of online articles at the end of this post that provide tips for taking better photos with a smart phone. And don’t worry if you don’t have Photoshop to edit your images; there are several free online image editors that will give you the ability to crop, color correct, sharpen, and apply basic effect filters to your photos (see links at the end of post).
Illustration
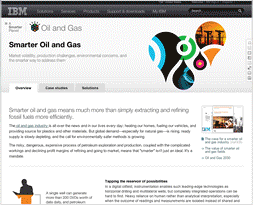
I think illustration is an underutilized resource for imagery. Some clients might be concerned that visitors to their site will think they’re not a “real” business if they use illustration. Evidence to the contrary is IBM’s smarter planet branding and Google’s practice of periodically replacing their logo with an illustrated doodle. A well-placed editorial illustration or infographic is a great tool for helping your audience visualize data, concepts or opinions that could not be served by a photo or a lengthy written explanation.
As with photos, stock illustration might work for your needs but, if not, don’t hesitate to commission a illustration. If your budget won’t support a professional illustrator, a good resource is local art colleges. Most art students are looking to expand their portfolio, especially with “published work.” If you’re not afraid to pull out a sketchpad yourself, a hand-drawn sketch or doodle can add originality and personality to your content.
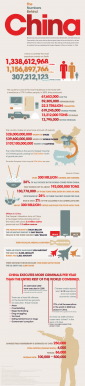 Charts and Graphs
If you’re looking for inspiration to help you create better data charts or infographics, the following two sites provide an abundance of examples from around the web and some tools for creating your own. Visual.ly is a gallery of the best data visualization examples on the web. They are also developing a tool that will enable anyone to quickly and easily create professional quality designs with their own data. FlowingData is data visualization blog written by Nathan Yau that “explores how designers, statisticians, and computer scientists are using data to understand ourselves better.” If you sign up as a member for $25/year, FlowingData will provide you with monthly tutorials on how to make and design publication-level data graphics.
Videos and Animation
Videos are a great way to add visual interest to your content and sites like YouTube and Vimeo make it easy to embed your videos into your content. You can layer visual information without taking up a lot of page real estate by using a slide show presentation or animated GIF. If you don’t have software on your computer to create animated GIFs you can use an online service like Gifninja or Make a GIF.
Image Preparation
Sizing and Resolution
Make sure the resolution of your final image is 72 pixels per inch (ppi) which is the resolution of the web. Digital cameras and smart phones capture images at a fairly high resolution and you’ll need to reduce them in size and resolution. If you don’t have access to an image editing program, you can use one of the online image editors listed at the end of this post. Also, make sure your final image is 100% of the size (or close to it) that you’ll be using on your site. Uploading an image directly from your camera will be far too large and slow down the load time of your website.
If you’re scanning a photo or illustration, capture it at 150 ppi or higher. It might be larger than you need, but reducing it from 100% of size won’t degrade its quality and you may decide to use it large or only use a section of the image. Also, scan in color since you can convert from color to black and white if you need to, but not the other way around.
A word about using images from the web: Google’s image search has become a de facto stock photo solution for some and, since those images are already at 72 ppi, enlarging them will only degrade their quality. I won’t go into the copyright issues of using images from the web in this post since I don’t have the time or space to discuss it thoroughly.
Cropping
Cropping, like copy editing, is an art form. But a few simple tips can help you maximize the impact of a image; whether it’s stock photo or an original piece. The subject matter is the most important part of any image, so if you’re editing a group photo of your workmates crop out the large expanse of wall behind them or the papers and coffee mugs on the table in front of them, unless it’s critical to the subject of the photo.
Rule of Thirds
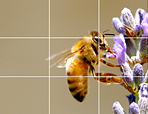
The Rule of Thirds is a helpful guideline in creating more interesting and dynamic compositions in your images. Divide the image area into thirds both horizontally and vertically, which will create a grid of nine regions. When cropping (or composing) an image, placing the main subject over or near the ⅓ or ⅔ grid lines will create an asymmetrical composition that is more visually pleasing than placing the subject dead center. Check out this site for a deeper investigation of the Rule of Thirds.
Image Placement
Sometimes it’s better to use a single, impactful image rather than several mediocre ones. One well-positioned image can set the tone for a blog post or newsletter before a single word is read. A favorite example of mine is A List Apart, due to the unique watercolor illustrations that accompany each article. They are simple and elegant in form but pack a lot of meaning.
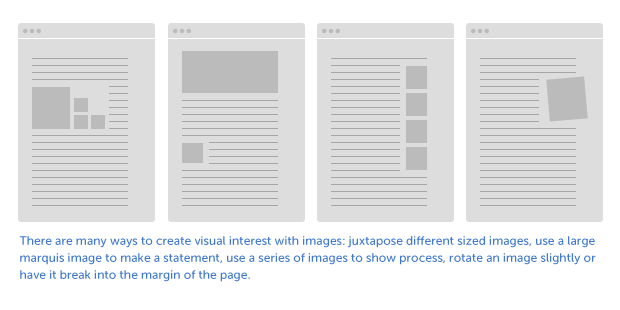 Multiple images can work in your favor if you take time to consider how to use them. A series of step-by-step images can explain a complicated process or a small grid of photos showing variety in a product line. A tight collage of images in varying sizes is more visually interesting than simply stacking them one on top of another. In the February edition of our newsletter, The Four Stages of Content Marketing, Chris Butler created a timeline graphic that ran nearly the entire length of the article. This unique illustration not only adds visual interest to the newsletter but also reinforces how much time has passed since the inception of Newfangled’s content marketing strategy.
Other ways of creating visual interest with images:
• Vary the scale— juxtapose 2-3 small images with a large one.
• Rotate the image a few degrees or set it slightly into the page margin.
• Convert the image to black and white or a single color, such as a sepia tone.
• Crop the image in an unusual way.
——————————————————
iPhone photo tips and suggested apps for enhancing images
http://www.imore.com/2011/05/18/daily-tip-pictures-iphone-camera/
Smart phone photography tips and recommended apps for iPhone and Android
http://thenextweb.com/lifehacks/2011/07/31/how-to-take-incredible-photos-with-your-phone/
iPhone apps for editing and styling photos
http://www.sheknows.com/living/articles/848245/iphone-camera-apps-take-and-edit-great-pictures